Conceptual Design
Seasoned Photographers will say that , “Photoshop is to be used as a chisel, NOT a jackhammer” but in marketing I’d say, “if you can think it, I can do it. And if I cannot do it, I can fake it.”
So when I was asked to shoot photos of prototype product samples, and map Illustrator graphics on to simulate the final product, I jumped at the challenge. This was for a product catalog deadline that had to be met before a major trade-show.
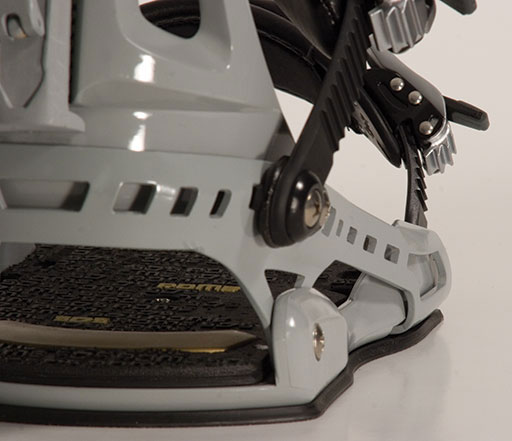
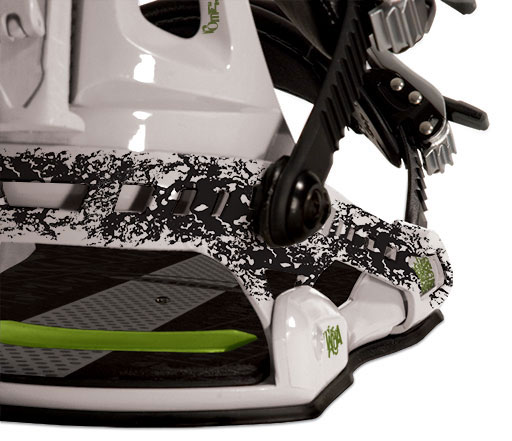
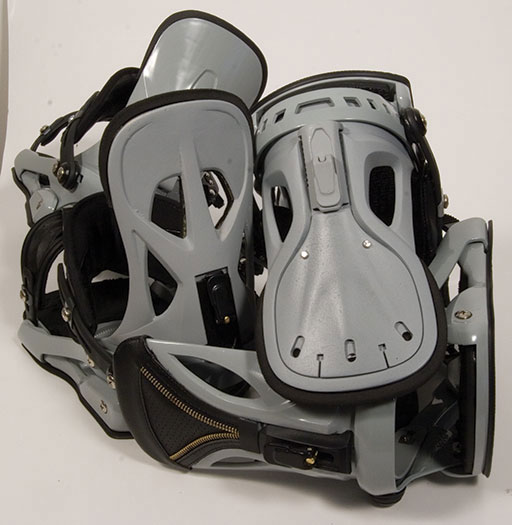
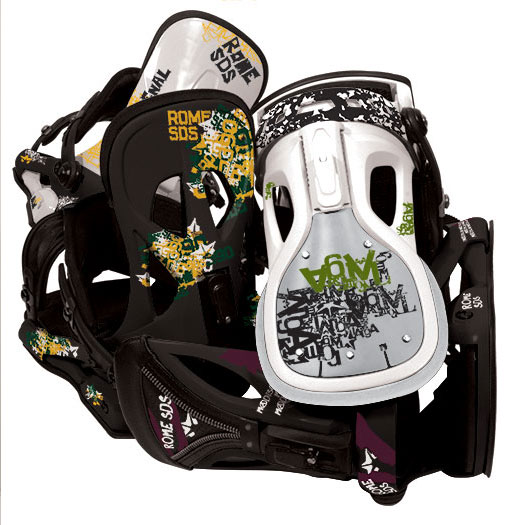
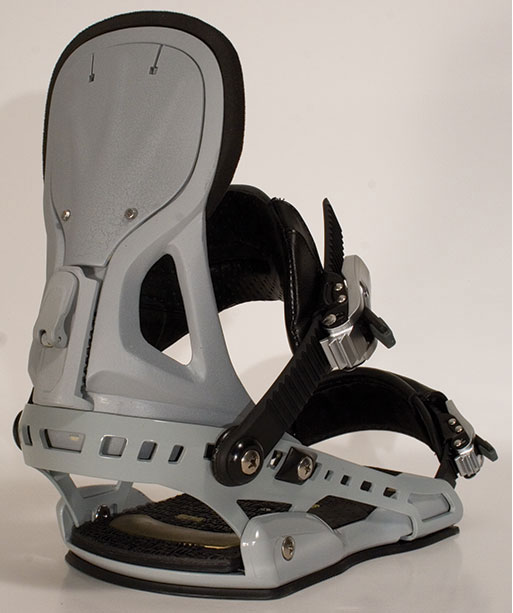
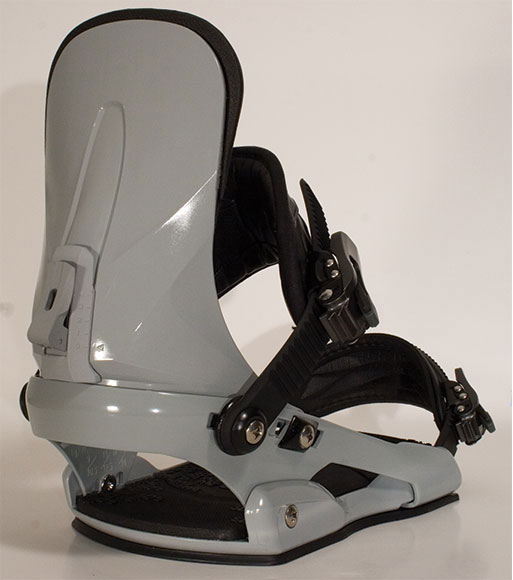
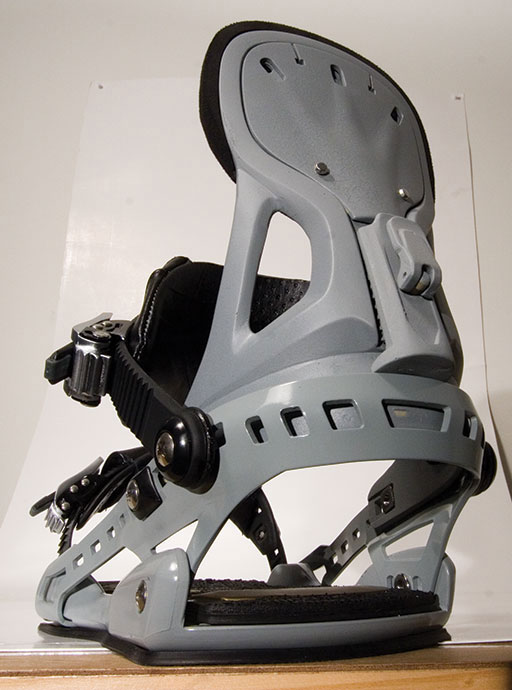
I asked the manufacturer that the clay modeled parts, and the sample parts that they did have were painted grey. This makes it easier to color correct later in post, as well as retain shadows and highlights. I traveled to their office in Vermont on the weekend, and set up a makeshift photo studio. It was key to have the product engineer there to school me on what was correct and what wasn’t on these models. We also had the graphic artist who was laying out the catalog on hand to direct the shot angles and composition. All in all, 16 shots were needed.
Photoshop Layers Madness


“Fake it till you make it”
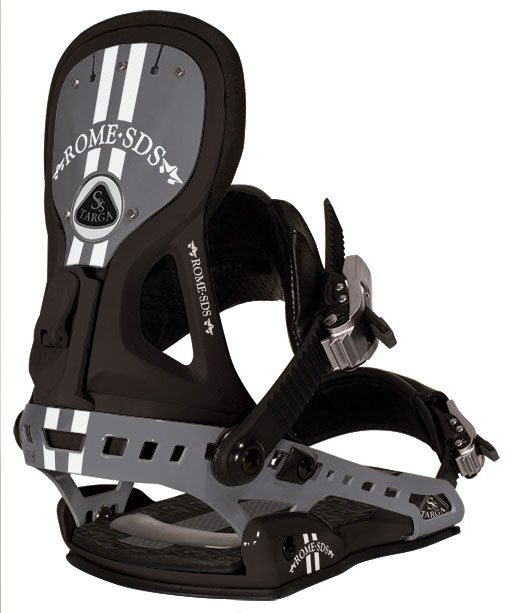
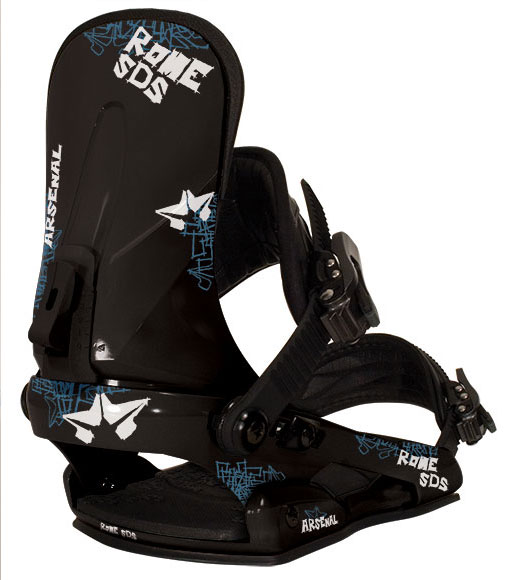
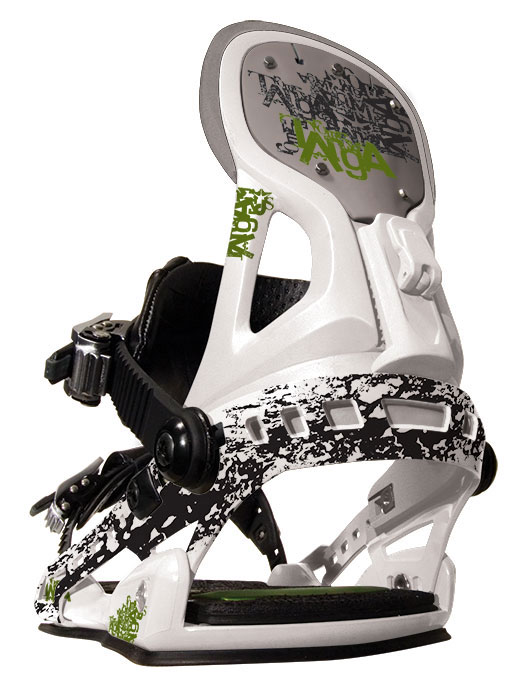
I under budgeted my time to complete each binding, as I thought each would take me 2 hours. It was more like 3-4. So my hourly rate went down but I sure learned a few new tricks! Each supplied vector graphic had to be rasterized, then skewed or 3D transformed to fit the shots perspective. Finally blended onto the color corrected part. I’ve never created so many layer masks as in this project!
The group shot was a challenge. Needless to say that I’m now a Pro at clipping masks! The Bézier curve is my best friend.